Top Food Blogs

Friday, November 4, 2011

A little photo blog of all the things i have created recently

Hello i am not blogging a recipe today, i am just going to post a couple of pictures of works lately

This was my recipe of the day this last week in the St Francis Village News, it's cheese and herb crusted hake with sauteed potatoes and cherry tomatoes and sweet 'n crunchy veg


This is Smoked Salmon on potato rosti with creme fraisch and balsamic reduction

This is plating starter for a wedding of 120 people

This is one of the most original wedding cakes that i have done thus far, it's an amazing drunken pecorino, dolce latte gorgonzola, french brie and camembert

Classic eggs benedict

Rustic coal roasted peach salad with Mediterranean vegetable pasta

Light dessert of strawberry and short bread stack

a fairy cake that i done for a little girls birthday, talking about birthdays it is my eldest daughters on the 13th November and i will be making 2 fairy cakes, i will blog those.... until next time...

Friday, October 21, 2011

Classic Eggs Benedict

Hello to all the avid readers and those of you that are ready for the first time

Today i decided i will do a wonderful little breakfast that i think is still one of the best classic breakfast of all time, and you have to try it at least once in your life, once you have i am quite convinced that you will try it again and again and again, there is just something about the marriage of poached eggs and hollandaise sauce that is so wonderful.

so here we go first for the hollandaise sauce
Ingredients
3 egg yolks
1/2 tsp cayenne pepper (depending of how spicy you like it)
salt (to taste)
1 TBSP White wine vinegar reduction (read below recipe is there)
(if you do not want the hassle of doing the white wine vinegar reduction the you can use the same amount maybe a little more lemon juice)
240g Butter
1 TBSP warm water

White wine vinegar reduction you will need 1/2 cup of white wine vinegar and 1/2 a medium onion finely diced,


 place into a small saucepan and reduce until there is only 1 TBSP of Liquid left, strain and retain the reduction for the hollandaise, the onions you can toss.

Now take the butter and clarify it in a small saucepan this is done by simmering it on a medium heat until you get a froth on top, you need to skim it off, and you will see sediment stick to the bottom don't stir it up leave it there, now you will notice that the butter has gone translucent, this means it is clarified, leave it to cool slightly, i would say if it burns your cuticle as you put your finger in it, it is still to hot, you should be able to hold your finger in it your around 3 seconds before it burns the cuticle. that is the right temperature.


Now put the egg yolks, water, cayenne pepper, salt and vinegar reduction into a bowl that you can place on a pot of simmering water

now you can start to whisk it together, you will notice that it starts to lighten in colour and will first go runny and then start to thicken, please be very careful not to over heat the eggs as they will split and you will get a bowl of sour scrambled eggs.

once it starts to thicken you will need to slowly drizzle in the clarified butter, very slowly whilst whisking all the time it will then start to emulsify everything together, carry in until all the butter is incorporated into the mix.

Okay if you have been intimidated to make it by now i do understand i have seen chefs of mine that have been making it scratch for 3 years now still split it on the odd occasions so just don't give up, it is not the easiest sauce to make.

But now for the rest
1 big slice of Gypsy Ham
1 Egg
1 English Muffin
spring of parsley
1 TBSP spirit vinegar
1/4 tsp paprika
1 cherry tomato
1 tsp Extra virgin olive oil
Easy from now on out.....
take the vinegar and pot into a small pot of water that is just before the boiling point, you need to keep it there, now stir the water to create a whirl pool in the middle


Now drop the egg into the middle of the whirl pool and leave it


It takes around 4-6 minutes for soft egg. depending on how hot your water is.

Now cut the English muffin in half and put ham on the one half, don't skimp on the ham.


Now put the other half of the muffin on top of the ham, it is better to keep the crumb on top, as this will stop the egg from falling off.


Now this is where all the magic happens, spoon the hollandaise over the top of the egg and let it run over everything, then garnish it with a spring of parsley, and sprinkle the paprika, quarter the tomato and place neatly around the plate and drizzle with olive oil.


Hmmmmmm yummy yummy - now there are so many different things that you can do with this, at St Francis Links we do a Egg St Francis with in place of the ham has some garlic, lemon & herb sauteed mushrooms, pickled jalapenos, smoked back bacon and grilled cheddar cheese, and then topped with the poached egg and hollandaise sauce. We call it Eggs St Francis if you ever pop in and would like to give it a try....

Until Next Time happy cooking

Tuesday, September 27, 2011

Making Gruyere at Home

Hello all, here is something that i have been working on and it has taken some failures in the making and that is to make Gruyere, i think i have finally cracked it so i am going to share the entire process with you from beginning to almost the end, that would be the eating but we will not no that for another couple of months.

so here we go.......

First and most importantly when making any cheese and especially aged cheeses is hygiene, i wash all my utensils with hot soapy water and then i boil them for around 20 minutes in a pot on the stove, things that are to big to put into a pot, i place in my oven and steam them for 30 minutes.

Cheese making is all about bacterium so you only want the correct ones to grow not the "bad" ones.

So now that everything is sterile we can start (everything includes the pots used to make the cheese).

I am using 2 x 20lt pots in this recipe and this should yield around a 4,5kg Gruyere at the end depending on the milk.

ingredients
40lt of pasteurized milk (if you use fresh you must use it within one hour of milking and it is best to pasteurize then your self buy getting it to 63 degrees Celsius for about 15 minutes.
1 tsp - Thermophilic culture - i use CHR Hansen ST-M5 DVS
1/8 tsp Propioni Bacterium
1.5 tsp calcium chloride
2 tsp liquid rennet (i use animal rennet)
(here are some guidelines if you want to make a smaller batch, thermophilic culture you use 1/3 tsp per 10 lt's of milk, rennet you use 4 drops per liter of milk and Propioni is a tip of a tsp per 10 liters of milk and calcium chloride is 3/4 tsp per 20 liters of milk)

Method:
i used 2 pots and a tilting pan filled with water (most of you will not have a tilting pan so make a bain marie using another pot.
you now have to bring the milk up to 32 degrees, i find that this usually takes me around an hour, as you don't want to go over that temp because you'll have to bring it back down again and that takes even longer, so i slowly heat the water in the bain marie, in my experience thus far, the milk in the pots is usually around 4 degrees colder than the water in the bain maire.

So now once the milk is up to 32 degrees i sprinkle the thermophilic culture on top of the milk along with the bacterium and leave it for 5 minutes to rehydrate, then using a sterile ladle i slowly pull the cultures into the milk but trying not to break the surface of the milk.
 Leave it to "ripen the milk" this is where the culture turns the lactose into lactic acid, this then in turn helps the rennet create the curd, so leave it to ripen for 10 minutes at this point you will add it the calcium chloride which you must dilute with 50ml of water, this just helps obtain a "stronger" curd if the milk is of "poor quality. You must mix it in the same way as the cultures by pulling it in.

Now add in the rennet also dilute it with 50 ml of cool water first and do exactly the same as with the calcium.

Now you need to keep it covered and do not disturb it for about 40 minutes - 1 hour until you can get a clean break, this is when you insert your finger and pull it up the curd breaks cleanly off your finger.

If you have not achieved a clean break, leave it for another 10 minutes.
Once you have got a clean break you then need to cut the curd, i cut the curd using a wire whisk, the curd needs to be evenly cut up into "rice" sized granules. once you have cut the curds leave them to settle for 5 minutes.

Then this is the hardest part of all, you now need to bring up the heat of the curds to 46 degrees but this has to take our hour to do and you have to stir constantly and softly for the entire hour.

This is where it can go wrong, you have to let the curd temperature increase by 1 degree every 5 minutes, and then the last 10 minutes they must increase 2 degree's.  Trust me when i say that if it isn't done like this it will go wrong in every way possible. i thought that it couldn't be that important and ended up waisting an entire batch.

You can see in this picture i have a large stick blender that just keeps the water rotating so that i don't get hot spots, also under the pots i have large slotted trays so that the pots aren't directly on top of a hot surface.

After the curds have reached 46 degrees, let them settle for 5 minutes, in the mean time place a colander over the mould that you are going to use and line it with a cheese cloth
Once the curds have settled pour them into the colander, the whey will warm up the mould, the actual mould i am using to press my cheese with is an old bucket that i have made holes in and sterilized it, it is onside the yellow bucket.

Once the curds are strained you can put them into the mould with the cheese cloth and press them either in a cheese press or with some weights above it. This is a homemade cheese press and it works wonders, really easy to make wouldn't cost you more than R200

Now you need to prepare a brine solution of 18% this basically means you need to dissolve 18grams of salt into 100ml of water, i used 10 lts of water and 1,8kg of salt, you have to boil the water first and stir in the salt whilst it is boiling.

then take the Gruyere and float it in the brine for 12 hours turning it at 6 hours.

Then place it on a cheese mat to drip dry for around 2-3 days at room temperature, then place it in a fridge that is sitting between 10-15 degrees to age the cheese, now you need to wipe the cheese with a sterile cloth dipped into the brine every 2 days for 1 month, and turning the cheese each time, after a month you can change to washing it once a week, after 2 months you can stop, then just rub the cheese with a cloth once a week to help form a rind, and turn the cheese once a week, age for a minimum of 6 months, better if you can do it for 12 months.

Monday, September 19, 2011

Roast Pork Belly

Today i am going to blog one of my favorite dishes that is roast pork belly stuffed with apple and celery, this is the ones i done for this evenings R65 two course monday easy dinner at the links, so it's nothing over the top just "GOOD FOOD MADE GOOD"


Ingredients
......for the stuffed belly
1 Pork Belly (ask your butcher to take the bone our, but tell him you would like it as this makes really good spare ribs)
4 granny smith apples
1 bunch of celery (leaves removed)
2 TBSP caraway seeds
2 TBSP crushed garlic
coarse sea salt
black pepper

....for the roasting pan
1 TBSP Juniper berries
2 bay leaves
2 onions
4 carrots
1 cup dry white wine
1 bunch celery
1lt water
oil for frying
1 TBSP sugar

Method
Peel and cut the apples into thin cubes, slice the celery thinly, mix together with all the other ingredients for the pork belly.
Score the skin of the pork belly and rub with salt and extra caraway seeds. Then turn it over and lay the stuffing down the middle of the belly and roll it up tighly.

Best of all is, i didn't even tie the belly, but these were some really good quality pork belly's i see by the stamp on them that they are imports from Germany, we don't get such big & wide pork belly's locally though so you might have to tie it with some butchers twine.


To get the roasting tray ready, cut all the vegetables into big chunks - you don't need to peel anything.
put the stove on and get the roasting tray smoking hot then add the vegetables and then the oil and stir quickly - if you add the vegetables first there is less chance of the oil splashing up and burning you, when the vegetables start to blacken slightly add in the sugar and cook for another 5 minutes, now add in the rest of the ingredients including the wine and water and take it off the heat, put the rolled pork belly ontop of the vegetables and place in the oven at 200 for 2 hours, then put the oven up to 230 for another half hour.

Make sure that the pan doesn't run dry, you always want the same amount of liquid in it that you start with. so top it up, then you can take the liquid with all the vegetables in it and blitz it either with a stick blender or a food processor and then pass it through a sieve and you have a beautiful gravy, if it is to thin add a slice or two of brown bread and blitz again.

and that's it bon appetite.

I served it with roasted potatoes and country vegetables with butter and fresh oregano

Sunday, September 18, 2011

Limoncello & Duck ham

I know that the title sounds strange, and i think the 2 together would be, but the blog is about making home made limoncello and about making duck ham, a continuation of my last blog.


Firstly lets do limoncello, for those of you who don't know what it is, it is a lemon liqueur made by the Italian's it is used as a digestive to be drunk ice-cold after a meal, it has the beautiful flavour of the lemon but not the bitterness or sourness, this is achieved by extracting the lemon flavours from the zest and not the inside of the lemon.


Ingredients 
12 large organic lemons (this one is kind of important as non-organic lemons tend to have wax added to the rind as well as chemicals which are not good. so if you cannot get organic lemons then take your lemons and wash them in cool water with a fine scourer and scrub the lemons, be sure not to take off the rind as this is where the flavour lies)
1,5lt Vodka - i used Smirnoff triple distilled (good vodka, good drink)
800g White sugar
700ml water

Method
You need to peel the zest off the lemons, but you really only want as much of the yellow rind as possible and not to much of the white pith as this can give you drink a slightly bitter feel on the month. then cut this zest into as fine as possible strips, pour all the vodka over them and place in a glass container tightly covered for 3 days, stir it once a day if possible.

Then add the water and sugar to a small pot and bring it to a boil while stirring, do this until all the sugar has dissolved, then let this cool down to room temperature and add it into the vodka with lemon, mix in and let it stand for another day, then strain it through a muslin cloth and pour into bottles and place in the freezer, after about 5-7hours they will be ready to drink, it is as good as it will ever be at this point, so don't think that if you leave it longer to "soak" the flavour will get better, i promise it is at it's prime.

Enjoy.


Now the duck ham......

i have made my spice rub and i have rub my duck breast and placed them in the fridge for 3 days, they now look like this......


Now they have to be washed off under some cold water and patted dry until completely dry.

Then they are wrapped with cloth and hung up to "ripen" for 20 days in a cool dark place, i put them into my dry store at work because it is dark and my walk in fridge's door is in the dry store so it is the coolest place in the kitchen.


After 20 days it will have the same appearance as Biltong.


When these are ready, my Camembert will be ready, and my fig preserve......sounds like an awesome sandwich to me!!!!!!!!!!!

Friday, September 16, 2011

Cheese, cheese, cheese and more cheese......

Believe it or not, but not only have i been studying and practicing "molecular Gastronomy", but i have gotten involved in making some really awesome "artisan" stuff as well, this picture above is my current cheese collection that i started about 4 months ago.

Wow has this been fun, i have made Pecorino, Drunken Pecorino, Camembert, Grande Brie, Parmesan, Provolone, Gouda, Monterey Jack, Haloumi, Feta, Cream cheese, Tomme de Lullin and gorgonzola's thus far, and next week monday i am getting cultures to make real cheddar, Gruyere, Emmenthal, Raclette and many many more.

So now on this blog, i am going to feature something that i am working on for my December menu here at the Golf Club and that is a totally in-house made Gourmet sandwich with the following: Camembert, Duck Ham, Green Fig preserve on a pickled onion & peppadew bread with farm style butter.

This means that the Fig preserve will be made in house (i have a massive green fig tree, that is starting to fruit now after the long winter) the duck ham i started yesterday, will post a picture lower down, the bread is made in-house with no additives or preservatives and good stone ground flour, the Camembert i am making already, just getting my timing right now for it to be mature, and the butter is real unsalted farm butter that comes in a ball and smells almost cheesy, this is made by a dairy just down the road, have made my own butter cost is too expensive, and this stuff is the real deal, much better than the conglomerates stuff, and then lastly some good quality organic rocket from an amazing little organic farm down the road.

So first the Camembert, this is not the hardest of cheeses to make, i actually think it is one of the easiest in my own opinion. it starts off with milk (pasteurized is ok to use, as long as it is not more than 24hrs old), a mesophilic type cheese culture, bacterium candidum, and liquid rennet, i am not going to post the entire recipe if you would like it, comment on the page and i will give you my email address and i can give it to you like that.

(Also if anybody is looking where to get cheese cultures contact me and i will put you in contact with the right people who deliver any where in the country!!! and it is real cheap!!!!!)


Here is a picture of one of my Camemberts, this one is now 16 days old and can be eaten from about 21 - 28 days.

The duck ham is soo super easy to make as well, i have made a small batch before to try it out and it worked wonders so i made a big batch yesterday, the basics of the ingredients are duck breast, preferably fresh, i used maldon sea salt, but Sel Gris would be better or even a pure non-iodize sea salt, organic coriander seeds, organic thyme and black pepper, it is best to use organic stuff as it does not have harmful chemicals in it that may cause bad bacterial growth on the ham, and fresh garlic (not the bought crushed stuff PLEASE)

this is what the duck ham looks like whilst in the cold room
it sits in the spice mixture for 3 days, which ends up being a pool of liquid, then it is rinsed off with water and patted dry, then wrapped in muslin and hung in a cool, dark place for around 20 days, hey presto that easy.

Anybody who has made preserves knows how easy that is, for my green figs, i will macerate them with fructose for a couple of hours, then add sugar, water and the macerated fruits to a pot and cook slightly, then into sterilized jars, leave for a couple of weeks and ready to use, it is that easy, if you don't macerate the fruit it is normally equal parts fruit and sugar to make good preserves.

And then lastly the bread, to me it is of utmost importance that people stop using flour that is bleached, it is bad for you, the stone ground flours are only a rand or two more but the health benefits are exceptional.
Bread is a really easy thing to make, we always make our dough the day before and then leave it in the fridge over night and then in the morning shape it and leave it to proof again and then bake it. Basics in bread making are 1 pkt instant yeast per 800g flour, 1 tsp salt, 1 tsp sugar, 1 TBSP olive oil and around 450ml water. this will yield a nice big bread. we change our bread on a daily basis and make things like sun-dried tomato and herb, olive & feta and so on and so forth the combinations only end were your imagination ends.

So anybody who is interested in either cheese-making, or baking bread or making duck hams, feel free to contact me through my blog and i will drop you any information that you may require.

I will be posting in the next week again, i have an amazing cream cheese recipe to make your own cream cheese and then a cheesecake from your cream cheese!!!!!!! awesome stuff


Happy cooking,
 This is my Gorgonzola - at 3 weeks
 My Drunken pecorino at 4 months
 Gouda at 2 weeks - will get waxed in 3 days time
Tomme de Lullin at 3 weeks

Monday, September 12, 2011

neglecting my blog

Hello all of those of you that do read my blog, it has been a long time since i posted something, i have just been so dam busy with work, creating and family, however i will be posting some new and exciting things on the blog within the month still, i have been making a bucket load of cheese so i will take a couple of photo's as well as do some step for step instructions on cheese making, it is so much fun, and really very rewarding so, so by the end of this year i hope to be using only homemade cheese for all the dishes in the restaurant, i will be looking to do a lovely duck ham, Camembert & green fig sandwich, everything would be made in house, i do think that is going to be exciting as well as all our cheese boards will be in-house made preserves, biscuits & cheeses.

So look forward to doing all of that, as soon as i have got a couple of pics together i will do the whole cheese making blog.

Until then................the hungry chef will be creating.

Saturday, July 9, 2011

A blog about me......

At this url there is a blog from a news paper journalist who can to the links recently and i have the opportunity to talk to and feed, so she done a small piece in the Heralds Weekend Post dated 9 July 2011, it makes for some interesting reading and is alot of what i am about so follow the link and enjoy.  http://theglobaltable.wordpress.com/

Wednesday, July 6, 2011

Blue Cheese, apple and almond "strudel" with strawberry compote and fresh cream

Hello Everybody,
here is a quick little recipe of a blue cheese, apple and almond strudel i made the other day that really was to die for first thing you going to need is some either store bought puff pastry or homemade puff pastry, if you look further down in my blog the dark chocolate fondant with strawberry mille feuille has a beautiful homemade puff pastry recipe, i must warn though, puff pastry is not easy to make and you will take a couple of goes to get it right, and it takes around 3 hours to make, but it is worth every drop of sweat and stress that it takes to make it.

Ingredients
 .......for the pie
About 300g Ready rolled puff pastry
1/2 bag of granny smith apples, peeled, cored and sliced
+/-200g Dolce Latte gorgonzola (i choose this over other blue cheeses as it is soft, creamy and not as strongly flavour, so most people will enjoy it)
150g brown or treacle sugar (you can use white)
150g almond flakes
1/4 tsp pimento (all spice) optional
1 big handfull of bread crumbs.
2 Tablespoons brandy

......for the strawberry compote
250g frozen strawberries
125g white sugar
125ml good semi-sweet or dessert white
125ml water
1 vanilla pod split and scrapped (use 1 teaspoon essence if no pods)


Method
firstly put all the ingredients for the strawberrys into a small saucepan/pot and cover with a lid and let it "mascarate" for around 3 hours on a really really low heat, you don't want it to simmer, there may be a few bubbles but generally not a simmer as you don't want the fruits to break apart, but you want them to inpart with their beautiful flavours.

now for the pie
put the apples, pimento, sugar, blue cheese, brandy and almonds into a mixing bowl and leave covered for around 30 min, whilst letting the apples sit, roll out the puff pastry so that is it around 2-3mm thick, it will be a very big square.
now that the apple mixture you see it will have alot of liquid in the bottom of the mixing bowl, that is a mixture of the apple losing some of its water along with the sugar melting and so on, you don't want to throw that away, it is about the best part, but if you just put it into the pastry like that it is going to make the pastry very moist and soggy so no throw in the bread crumbs to absorb this moisture and mix everything together thoroughly, then take this mixture and place it onto you puff pastry to form a long line in the middle of the pastry from one end to the next, now you need to take 2 eggs and beat them with a little milk (25ml) this is your egg wash. now around the mixture "paint" the pastry with the egg wash, then take the bottom half of the pastry and fold it over the mixture tightly, but be carefully not to tear the pastry, then paint the pastry that is now on top of the mixture, then fold the rest of the pastry over that piece as to close all the mixture in pastry, now you should have a long log like roll, with 2 layers of pastry on the top, take a buttered baking tray and roll the log over so that the two layers of pastry are sitting on the bottom, and pinch the ends tightly closed, now paint the all the visible pastry with the egg wash then take a sharp knive and cut slits into the top of the pastry (should look like the cuts on a french loaf) then place it in a preheated over at 180c and bake for around 30-40 minutes until golden brown.

Now to serve slice nice big slices of the strudel top it with the strawberry compote and whip up some fresh cream until soft peak and serve with that.

This dessert really is something that i think is going to make it onto one of my menu's soon, it really really is awesome i loved it and think that anybody who likes blue cheese will as well.

Bon Appetit

Saturday, July 2, 2011

Rabbit Liver, prune and vanilla parfait with tomato jam

Hello guys here is a quick little "amuse bouche" that i done last night for a small dinner party, i was preparing rabbit and of course when you buy rabbit, the liver, kidneys, heart and lungs are still in the animal, so i decided to make a liver parfait. Now this is a very rich dish so i served it pre-starters and was a big hit.

Ingredients:
liver from 2 rabbits
2 TBSP butter
1 tsp flour
1/2 onion cubed
8 prunes pitted
1 vanilla pod scrapped
1/2 teaspoon garlic
150ml rabbit stock (made from the bones of the 2 rabbits)
200ml fresh cream
50ml port
salt and black pepper to taste
homemade tomato and chilli jam
mini melba toasts

Method:
Get a small pan nice and hot put about 1 tablespoon of olive in and add the butter, as soon as the butter starts to "sing" and bubble add in the livers leave them for around 2 minutes on each side then add in the garlic and onions, saute this for around another 3-4 minutes and then add in the flour and let it be absorbed by all the fat in the pan, when their is no white of the flour visible in the pan add in the port to deglaze for around 1 minute then add in the stock and cream and season, add in the vanilla and pitted prunes and drop the heat and cook covered for around 5-7 minutes. Then take out the solid and put them into a food processor and blitz them up adding in the liquid as needed, you will end up using all the liquid, stop the food processor every 30 seconds or so and scrap down the side to ensure that everything is being puree'd. Then take it out of the processor and push it through a very fine sieve to get out all the impurities.

To serve i used tall shot glasses and i put a pitted prune in the bottom then piped the liver in about half way and topped it with a homemade tomato jam, then took the vanilla pods that i had scraped and used the beans to make the garnish and served with two small little pieces of melba toast.

I must say to any body who doesn't normally like liver, you should really give rabbit liver a try it is amazing, i think it is one of those foods that is going to be on the up in a big way in the next couple of years.


Enjoy next up i will blog a lovely rich Fricassee of Rabbit with tagliatelle, mushrooms, garlic, onions and white truffel oil. lovely dish i made this dish also with the stock from the 2 rabbits from above and then the meat of them.........until then Bon Appetit

Wednesday, June 15, 2011

Warm Chocolate Fondant and a story of a little something that has bitten me badly........

Ok let me start off with a nice simple little recipe that is easy to make and will be a hit at any dinner party i originally started with blog to create recipes for people to cook at home and i have slightly gone off the beaten  track with it, but i will explain that i little later on in a little more detail,

i blogged this dessert earlier in the week as i like to make it, but here is a simple version of it that anybody can make at home with out stressing.


Ingredients


200g Dark Chocolate (min 60%cocoa solids)
180g butter
4 eggs separated
6 Chocolate Truffles (i use Lindor)
140g Castor Sugar
50ml Brandy
Butter for buttering moulds


Method

  • Melt the chocolate and butter over a double boiler on the stove
Separate the eggs and whip the egg white until almost stiff, then
Slowly add half of the castor sugar until the egg whites are stiff.
  • Cream together the other half of the sugar and the egg yolks.
  • Then mix together the yolk mixture with the melted chocolate
Adding it slowly in the beginning and then faster towards the end
Add the brandy and then fold in the egg whites until incorporated.
·        Butter the ramekins pour the chocolate halfway up the ramekins, then place a chocolate truffle in the middle and then add more chocolate to fill the ramekin.
·        Bake in a pre heated oven at 165°c for 15 min.


Best served with berry coulis and vanilla ice-cream.


Well i have stumbled across something that i never really in-visioned myself to get into and that is the whole scientific approach to food and cookery, but i must say this in the defense of anybody who thinks it is taking away from the roots of cooking, no it isn't!!! it is giving so much to the world of cookery, it is opening so many new creative avenues it is breaking all "normal" perceptions of what food should be. i have starting playing with the science of food and the perception of flavour, and i can honestly say that in my life thus far in the kitchen i have never been so excited to get into my kitchen in the mornings and to start playing with all the things that i have been reasearching, the only problem is that i live in South Africa so alot of the chemicals needed are extremely difficult to get hold of like i am battling to find Gellan at the moment, i know it has to be here in the country i just can't seem to find it yet, i battled a bit to get hold of transglutaminase but i mailed an overseas company and they got me involved with a company here, awesome stuff that is i must say, i have just "butterflied" a whole beef fillet and stuffed it with the hard fat from a rump and wrapped it and put into the fridge, will take a look at it tomorrow, i have to try and "put" marbling into the fillet to give it the flavour that rump and fatter cuts have. and that is just the start of it, i have "glued" chicken skin onto hake fillets, i have just "glued" together a piece of rump with a piece of chicken breast with bacon in between, will blog about it when i have cooked it, it is a crazy exciting world of food to be explored.....

My next big flavour perception project is to glue chicken skin on to a piece of fish and create exactly the same flavour chicken vapour, and fish vapour, to manipulate the flavour of what you are eating, i have done it with Heston's famous vanilla and/or cinnamon ice-cream and it worked out a real treat so now going to start testing how far i can take the concept into practical foods.

I know i haven't exactly been blogging about the things i set out to blog about by my mind has gone a little stray with all these new idea's and concepts.

I have been doing the "old school" stuff to though don't get me wrong, this month alone i have learnt to make cheese, if fact i have made Feta, Haloumi, Ricotta, Parmesan, Pecorino, Blue Cheese and today i am trying a modification of a gruyere, only thing about the cheese is that i now have a year wait for most of the cheese, except the blue which should be ready in about 2 months.

I am also looking at cured meats now, would love to learn to make my own cured meats, we'll see if i can get the opportunity to do so, i will keep you posted on that.

Monday, June 13, 2011

The Hungry Chef: Dark Chocolate Fondant with Strawberry Mille Feuil...

The Hungry Chef: Dark Chocolate Fondant with Strawberry Mille Feuil...: "This is a dessert that i have come up with starting to incorporate a couple things that i have been researching and doing i must stress thou..."

Dark Chocolate Fondant with Strawberry Mille Feuille and Blueberry caviar

This is a dessert that i have come up with starting to incorporate a couple things that i have been researching and doing i must stress though that this recipe is more for the seasoned professional than the average home cook because of the process involved in creating the dish, however it has all the WOW factor that you look for in a dessert. 

as the saying goes ....."the proof is in the pudding"

Dark Chocolate Fondant, Strawberry Mille Feuille and Blueberry Caviar (serves 8)

This recipe is not for the faint hearted as the process is quite involved. However, in my personal opinion, the end result is well worth all the effort.

…..for the chocolate fondant

Ingredients

200g 70% Dark Chocolate
4 eggs separated
150g castor sugar
180g unsalted farm butter
1 TBSP corn flour
1 tot brandy
8 chocolate truffles (see recipe below)
Butter for buttering ramekins
50g grated dark chocolate for dusting ramekins
8x 125ml ramekins

Method

Melt the chocolate and butter over a double boiler.
Cream together the egg yolks and half the sugar.
Whisk the egg whites with remaining half of the sugar until stiff.
Mix together the brandy and corn flour until ingredients are incorporated.
Butter the ramekins and sprinkle them with the grated chocolate and leave them in the freezer for 5 minutes.
Add the melted chocolate to the egg yolk and mix thoroughly, then add in the brandy mixture (it may seem at this point that the mixture looks like it wants to seize, however do not stress yet).
Add 1/3 of the stiff egg whites and whisk it into this mixture until all incorporated (you will see the mixture loosen up again)
Add in the rest of the whisked egg whites and soft fold them into the mixture until it is all incorporated.
Spoon mixture into ramekins until they are just under half full, then place one chocolate truffle (see recipe below) in the middle and top up the ramekin until  full.
Place the ready made desserts in the fridge for 30mins to and hour
Preheat the oven to 180˚C (very important that the oven is at this temperature before you put the fondants in), place dessert in oven and drop the temperature to 165˚C and bake for 12 minutes.

The mixture will rise like a soufflé over the top of the ramekin; this is what you are looking for, however once you take them out of the oven serve immediately as they will drop.

If you have a gluten allergy you can use this mixture to make a flourless chocolate cake. Bake at 150˚c for 45 minutes and let it cool in the oven for 3 hours

…..for the chocolate truffles

Ingredients

400g 70% Dark Chocolate
1 cup Cream or Crème Fraisch
Cocoa powder for dusting
100g melted chocolate for dusting

Method
Heat the cream until just below boiling and pour it over the chocolate, mix together thoroughly.
Leave it to cool down either on the counter or in the fridge, now take a melon baller and scoop out balls of chocolate.
Dip into the melted chocolate and roll in cocoa powder to coat.
Place on grease proof paper and leave in the fridge until ready to use.

…..for the Strawberry Mille Feuille

Ingredients

500g frozen strawberries
125g castor sugar
50ml brandy
Puff pastry as per recipe below
250ml cream
Icing sugar for dusting

Method
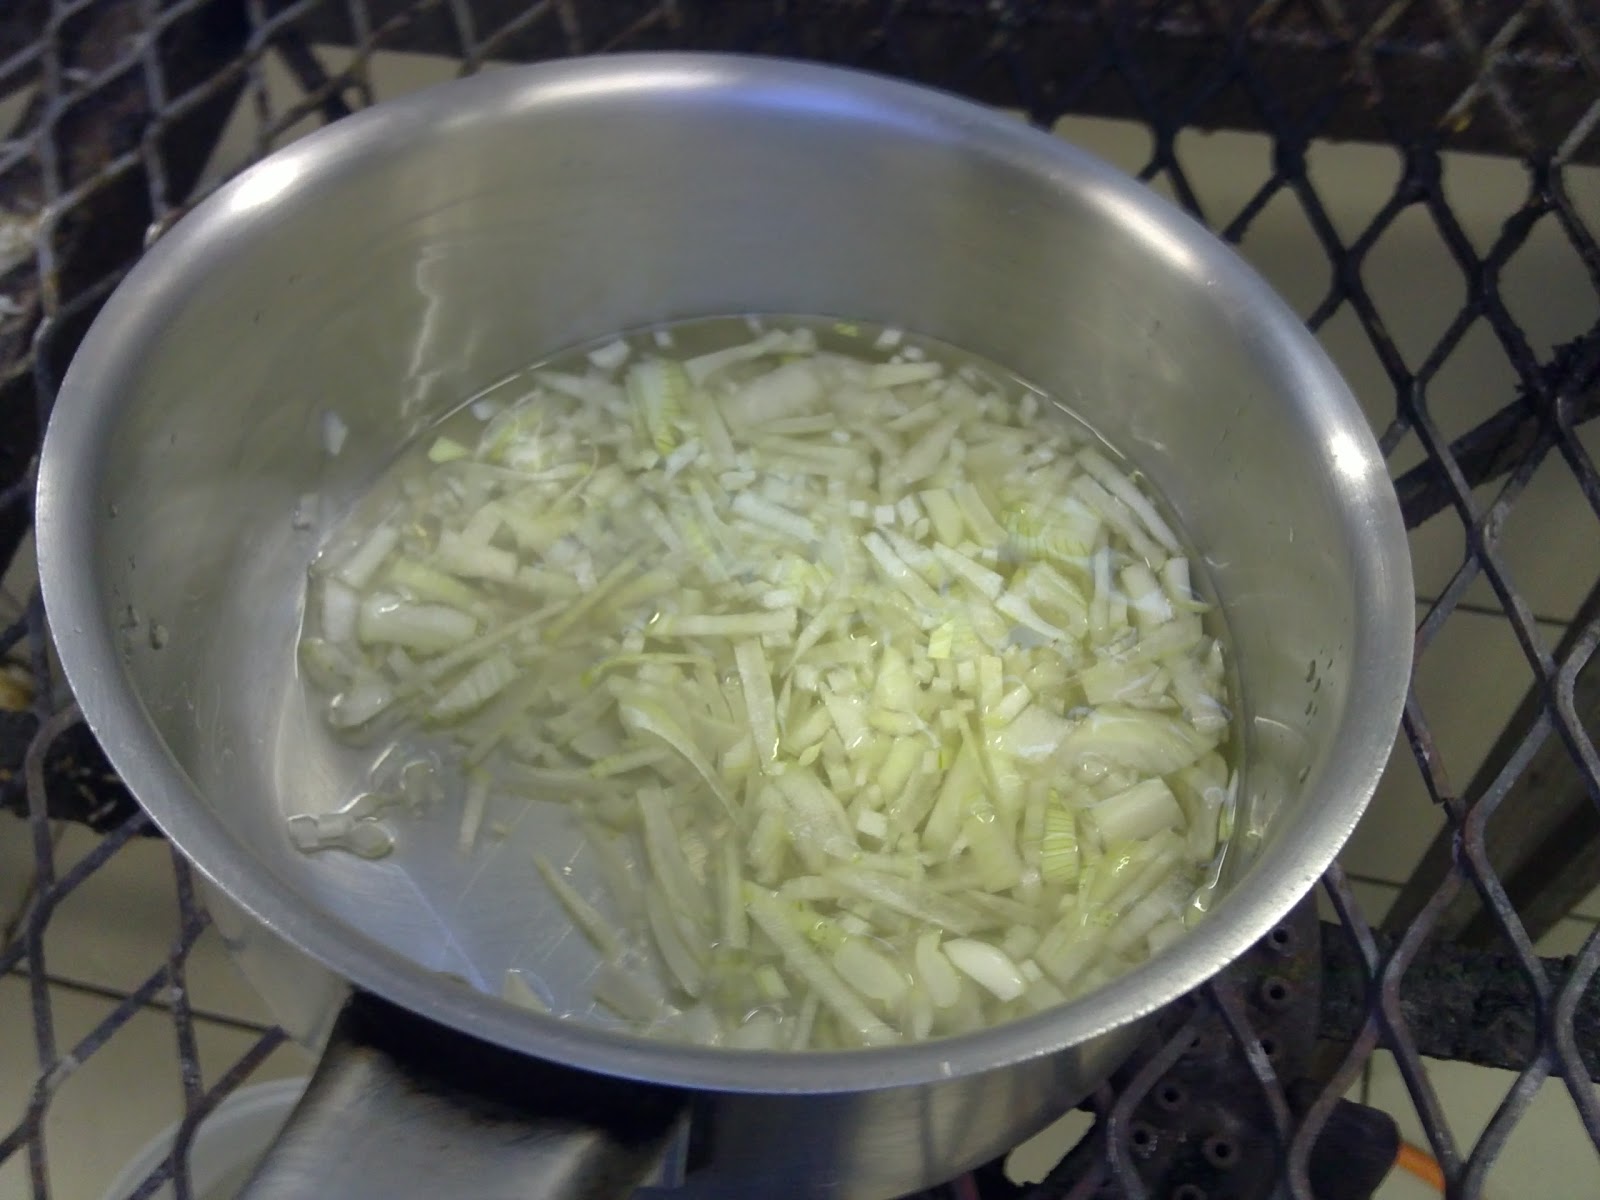
In a small pot, put strawberries, castor sugar and brandy, over a very low heat (the sugar must melt but it should not be bubbling), leave for about 45min (this process is called macerating the strawberries).
Roll out the puff pastry (see recipe below) and cut into strips about 3cm x 6cm, it is important that the pastry is not rolled out to thin.
Cut out 16 strips, place them onto a baking tray and dust the top with icing sugar and bake in a pre-heated oven at 200˚c for 8-10 minutes until golden on the top. Remove from oven and let cool before using it further.
Whip the cream until soft peaks appear and add half of the strawberries, blend it further until the cream is stiff and the strawberries are puréed into the cream (it goes a beautiful soft pink colour).
Cut the baked puff pastry in half horizontally, as if to open them to be stuffed, spread the bottom piece with the cream, place 3 macerated strawberries on top, place another piece of pastry on top and repeat the process, place the piece dusted with icing sugar right on top of the last layer of strawberries.

…..for the puff pastry

Ingredients

300g Flour
½ tsp castor sugar
1 tsp salt
30g melted butter
150-170ml tap water
200g cold butter (kept aside for later use)

Method
The principle behind the pastry is to create many layers of dough and
butter by folding and turning the two together. (Unlike short pastry, the butter is not incorporated into the dough but rather folded into the layers).

1) Sift the flour into a mound on a cool work surface and make a well in the centre. Add the salt, sugar, water and melted butter to the well.
2) Mix with four fingers until the salt dissolves.
3) Use a plastic pastry scraper to pull the flour into the well and mix until blended, adding the remaining water if the pastry is dry.  
4) Work the pastry into a sticky ball with the pastry scraper.
5) Make an X-shaped incision on top of the dough, wrap in lightly floured baking parchment or tea towel, then refrigerate for about 30 minutes. This is the détrempe.)
6) Sandwich the remaining 200 g butter between 2 sheets of greaseproof paper and tap with a rolling pin until softened to the same consistency as the détrempe. Form the butter into a square about 2 cm thick. Place the ball of pastry on a lightly floured work surface and flatten slightly with the palm of your hand. Press the rolling pin into the top edge of the pastry and roll out an "arm". Give the dough a quarter turn and roll out another "arm". Continue to turn and roll twice more until the pastry is in the shape of a cross. It should be mounded in the centre, tapering out the 4 arms. 
7) Place the square of butter on the mounded centre of the pastry and fold in the arms, stretching the pastry slightly to seal in the butter. (The 4 thicknesses of pastry on the top should be approximately the same thickness as the mound of pastry under the butter.)
8) Lightly tap the top of the pastry with a rolling pin to seal the edges and to enlarge and flatten the square a little. (This is the pâton) Then roll out the pastry to a long rectangle about 17.5 cm wide and 52.5 long.
9) The edges of the rectangle should be even and straight.  
10) Fold the bottom third of the rectangle up toward the centre, carefully aligning the edges. Brush off any flour.
11) Fold the top third down to make a neat square and brush off any flour.
12) You will have a neat square of pastry with the fold on the bottom.  
13) Give the square a quarter turn to the left for maximum rising. It is important that you always rotate the pastry in the same direction so the seam is always on the same side.
14) The fold should then be at the side.
15) Roll out the pastry into a long rectangle. 
16) Fold into thirds. Gently press 2 fingertips into the pastry to indicate that 2 turns have been completed.
17) Wrap the pastry and refrigerate for 30 minutes.
Give the pastry 2 more turns. Mark it with 4 fingerprints to indicate a total of 4 turns have been completed. Rewrap and return it to the refrigerator for another 30 minutes. (After 4 turns the pastry may be refrigerated for 2 days or frozen.) Give the pastry another 2 turns and mark it with 6 fingerprints. Then wrap and refrigerate it for 10 minutes more before rolling out for shaping and baking.

…..for the Blueberry Caviar

Ingredients

400g blueberries
1 cup of white sugar
½ cup good dry white wine
1g Sodium Alginate
¼ tsp sodium nitrate
6,5g Calcium Chloride
1lt of water

Method
In a small pot, place blueberries, white sugar and white wine, over a very low heat and “cook” for and hour (this process is called macerating the blueberries)
Remove from heat and puree, and drain over a container in a muslin cloth over night so that all the juice extracts.
Place juice in freezer until frozen,
Remove ice block from container and place on a muslin cloth again over a clean container and let “defrost” in the fridge, you will be left with a block of clear ice on the muslin cloth and half the amount of juice in the container.
Take this juice and add in the sodium nitrate, mix it in with a stick blender, once that is mixed in add the sodium alginate and blend thoroughly with a stick blender leave this mixture for an hour at room temperature to let all the bubbles settle,
Add the calcium chloride to the water and stir until it has dissolved.
With a surgical syringe, suck up the berry juice and drop it in small drops into the calcium chloride bath and leave them for about 2 minutes. Gently spoon them out and rinse with fresh water and serve immediately as the longer they stand the more they will form into gel balls and loose liquid and flavor.
Enjoy the fruits of your hard labor